4/5 Taking Photos That Sell Your Montana Home and Managing Showings Safely
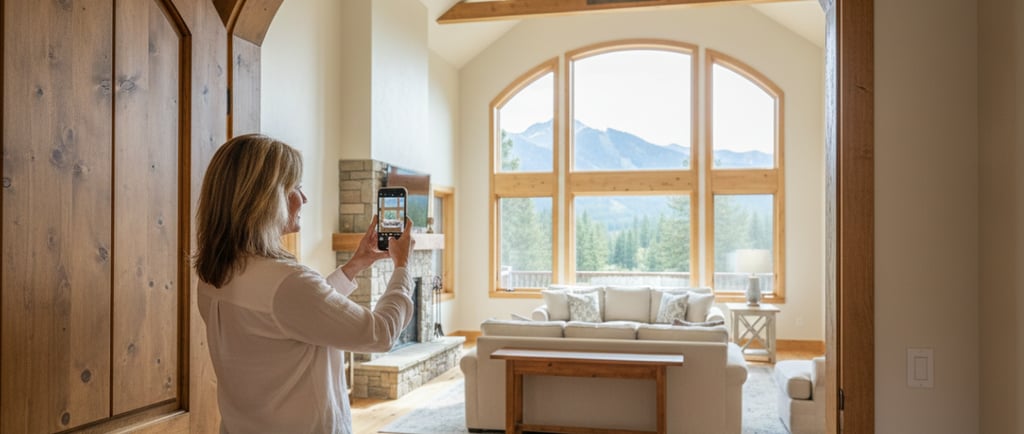
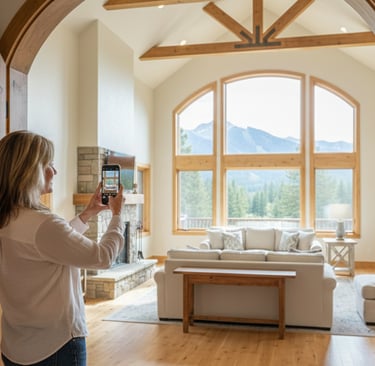
Take professional-quality photos of your Montana home using your smartphone by shooting during golden hour (early morning or late afternoon), turning on all lights, decluttering thoroughly, and using your phone's HDR mode. Manage showings safely by using free scheduling tools like Calendly and Google Voice, leaving during buyer visits, and collecting basic information from unrepresented buyers before granting access.
FSBOPRIVATE SALESELLING RESOURCESTIPSREAL ESTATE PHOTOGRAPHY
Kobus Taljaard
1/27/202614 min read
Taking Photos That Sell Your Montana Home and Managing Showings Safely
Last Updated: January 27, 2026
Take professional-quality photos of your Montana home using your smartphone by shooting during golden hour (early morning or late afternoon), turning on all lights, decluttering thoroughly, and using your phone's HDR mode. Manage showings safely by using free scheduling tools like Calendly and Google Voice, leaving during buyer visits, and collecting basic information from unrepresented buyers before granting access.
In the previous posts, I explained why private selling makes sense, what tools you need, and how to price and list your home. Now I'm going to show you how to photograph your property and manage showings like a professional.
I've photographed and shown hundreds of properties over 25 years in real estate. Here's what I know: 95% of buyers will see your home online before they ever come in person. Your photos aren't just important. They're everything.
But here's the good news: you don't need professional photography. You need good light, a clean house, and your phone. Let me show you exactly how.
Before You Take Any Photos: Prepare Your Home
Photography begins before you ever pick up your phone. The biggest difference between amateur and professional real estate photos isn't the camera. It's the preparation.
The 3-Day Prep Plan
Day 1: Declutter Every Room
Remove at least 50% of visible items. I mean this literally. Walk through each room and remove half of what you see. Buyers need to envision their belongings in your space, and they can't do that when your belongings fill every surface.
Clear kitchen counters completely except for a simple fruit bowl or coffee maker. Remove refrigerator magnets, children's artwork, and photos. Clear bathroom counters of all toiletries, medications, and personal items. Remove excess furniture that makes rooms feel cramped. Take down personal photos from walls. Store pet bowls, toys, and beds during photos and showings.
Day 2: Deep Clean Everything
Clean like you've never cleaned before, or hire professional cleaners for $150-$200. This is money well spent. Buyers associate cleanliness with good maintenance.
Scrub bathrooms until they shine. Clean windows inside and out (this dramatically improves natural light). Vacuum and mop all floors. Dust every surface, including ceiling fans and light fixtures. Clean appliances, especially stove and refrigerator. Wipe down baseboards and doors. Power wash exterior if needed.
Day 3: Final Touches and Photo Day
Make beds perfectly with simple, neutral bedding. Open all curtains and blinds. Turn on every light in the house (yes, even during daytime). This is critical. The combination of natural light and interior lighting creates the warm, inviting look you see in professional photos.
Replace any burned-out bulbs. Use bulbs of consistent color temperature throughout the house. Make sure landscaping is tidy and front entrance is welcoming. Put away all personal items one final time. Hide trash cans, recycling bins, and outdoor equipment.
Room-by-Room Prep Checklist
Kitchen: Clear all counters. Remove small appliances. Hide dish soap and sponges. Close cabinet doors completely. Clean inside visible cabinets if they'll appear in photos.
Bathrooms: Put down toilet lids (this is non-negotiable). Remove all personal items from counters and shower. Display only clean, folded towels in neutral colors. Hide toothbrushes, makeup, medications, and personal hygiene products.
Bedrooms: Make beds with hotel-level perfection. Remove at least half of decorative pillows (too many looks cluttered). Clear nightstands except for a lamp or simple book. Close closet doors or organize closets if they'll be photographed.
Living Areas: Remove excess furniture. Clear coffee tables and side tables. Fluff couch pillows. Remove remote controls, magazines, and personal items. Open curtains to showcase natural light and views.
Outdoor Spaces: Sweep decks and patios. Remove clutter, toys, and equipment. Stage outdoor furniture if you have it (suggests lifestyle). Trim bushes and mow lawn if needed.
Photography Basics (Anyone Can Do This)
Now that your home is prepared, let's talk about actually taking the photos. I'm going to give you specific, actionable instructions that work.
Timing is Everything
Shoot in the morning (9-11am) or late afternoon (4-6pm). This is called golden hour in photography, when natural light is warm and soft rather than harsh.
Avoid midday harsh light that creates strong shadows and washed-out windows. Montana light is particularly bright and beautiful. Use it to your advantage.
If you have mountain views, the hour before sunset is magic. The warm light makes everything look better. Schedule your exterior shots for this time if possible.
Your Phone Settings
Before you start, adjust these settings on your phone:
Turn on Grid Lines (usually in camera settings under Composition). This helps you keep shots level and follow the rule of thirds. Nothing screams amateur like crooked photos.
Use HDR mode (High Dynamic Range). This balances bright windows with darker rooms, which is the biggest challenge in real estate photography. Your phone probably has this as an automatic setting. Use it.
Never use digital zoom. It makes photos grainy and unprofessional. If you need a closer shot, walk closer. Your feet are your zoom lens.
Hold your phone level, not angled up or down. Angled shots distort room proportions and look unprofessional. Use the grid lines to help with this.
Take vertical shots for rooms with high ceilings or tall features. Take horizontal shots for wide rooms and exterior shots. Don't default to only horizontal. Montana homes often have beautiful high ceilings that deserve vertical shots.
The Basic Photo-Taking Technique
Position yourself in doorways or corners. This gives you the widest view of the room. Stand in the doorway looking into the room, not in the middle of the room looking at a wall.
Turn on every light in the house. I'm repeating this because it's critical. Even during daytime, turn on every light. This creates the warm, inviting look that makes buyers want to visit. Overhead lights, lamps, under-cabinet lighting in the kitchen. All of it.
Open all curtains and blinds. Let natural light flood in. The combination of natural light and interior lighting creates the best real estate photos.
Take 3-4 photos of each space from slightly different angles. You'll pick the best one later when you review on your computer screen. This gives you options and ensures you don't miss a good shot.
Shoot multiple rooms from the same doorway to show flow. For example, standing in a hallway, shoot into the kitchen, then turn and shoot into the living room. This helps buyers understand the home's layout.
The 10 Essential Photos Every Montana Listing Needs
Let me walk you through the specific shots you need. This isn't optional. These are the minimum photos required for a competitive listing.
1. Front Exterior (The Critical First Impression)
Stand in the street or at the end of your driveway. Shoot the entire front of the house. Include landscaping and any mountain views visible from the street.
This is the first photo buyers see. It determines whether they keep scrolling or click for more. Get this one right.
Time this shot for good light. Early morning or late afternoon. Not midday harsh sun. Not dusk when the house is dark.
2. Living Room
Stand in the doorway or main entrance to the living room. Shoot across the room to show the full space. Include the main seating area.
If you have a fireplace, make sure it's in the shot. Fireplaces are huge selling points in Montana. If you have mountain views through windows, position to capture those too.
Make sure the room looks spacious. Remove any furniture blocking the view from doorway to the far wall.
3. Kitchen (Take 2-3 Photos)
The kitchen sells homes. Take multiple angles showing different features.
Stand in the doorway showing the full kitchen layout. Take a close-up of updated features (granite counters, new appliances, tile backsplash). If you have an island or eating area, show that too.
Remember: kitchen counters should be completely clear except for a fruit bowl or coffee maker. Nothing else. Buyers want to see counter space, not your stuff.
4. Master Bedroom
Make the bed perfectly. This matters more than you think. A well-made bed suggests a well-maintained home.
Stand in the doorway and shoot the entire room. Show the bed and any windows with views. If your master bedroom has mountain views, capture them.
Keep the shot simple and uncluttered. Remove excess decorative pillows (2-3 is enough). Remove personal items from nightstands.
5. Master Bathroom
Put the toilet lid down. This is absolutely non-negotiable. Show the vanity, mirror, and shower or tub.
Remove all personal items. Display only clean, folded towels in neutral colors. If you have a nice tub or a shower with tile work, get a shot that highlights it.
Good bathroom photos suggest good maintenance. Buyers look at bathrooms carefully.
6-7. Other Bedrooms (At Least One Photo Each)
Show each additional bedroom with at least one photo. Stand in doorway, shoot the full room. Make beds, remove clutter, show windows.
These don't need to be as detailed as the master bedroom, but they need to show the space is usable and well-maintained.
8. Other Bathrooms (At Least One Photo Each)
Same rules as master bathroom. Toilet lid down. No personal items. Clean towels only. Show that the bathroom is clean and functional.
9. Outdoor Spaces (Deck, Patio, Yard)
Montana outdoor living is a massive selling point. Show your deck, patio, yard, and any views prominently.
Shoot from multiple angles. Show the space itself (the deck). Show the view from the space (mountain views). Show how the outdoor space connects to the house.
If you have significant acreage, take photos showing the land. Walk to different vantage points. Show boundaries if visible. Show mature trees, open meadows, or natural features.
10. Special Features
Photograph anything that makes your home unique. Finished basement. Workshop or garage with special features. Bonus room. Office space. Storage areas. Custom elements like built-in shelving or stone features.
Montana homes often have wood stoves, exposed beams, or custom stonework. These are selling points. Photograph them well.
Montana-Specific Photo Priorities
Mountain views: If you have them, they should appear in multiple photos. View from living room. View from deck. View from master bedroom. This is what buyers are paying for.
Outdoor space: Emphasize this more than you would in urban markets. Montana buyers want to see land, deck space, yard space. Show the outdoor lifestyle your property enables.
Natural wood and stone features: If you have exposed beams, wood floors, stone fireplaces, or log elements, highlight these. They're classic Montana character features.
Land and privacy: If you have acreage, take photos showing the space and distance from neighbors. Privacy is valuable in Montana.
Seasonal consideration: If you're listing in winter and have snow, embrace it. Snow-covered mountain views are beautiful. Just make sure walkways are clear and the house looks warm and inviting. If you're listing in summer, show green spaces and outdoor living potential.
Quick Photo Editing (2 Minutes Per Photo)
Don't skip this step. Quick editing dramatically improves your photos.
Use your phone's built-in photo editor. You don't need fancy software or apps.
For each photo:
Increase brightness by 10-15%. Real estate photos should be bright and inviting, not dark and moody.
Increase contrast by about 5%. This makes the photo pop without looking over-edited.
Use the straighten tool if the photo is crooked. Crooked photos look unprofessional.
Crop if needed to remove distracting elements at the edges.
What NOT to do:
Don't use filters. They make photos look artificial. Don't over-saturate colors. Natural looks better. Don't use fish-eye or wide-angle effects (unless your phone has a genuine wide-angle lens). They distort rooms and look fake.
That's it. Simple adjustments. Two minutes per photo. Upload the edited versions to your MLS listing.
Managing Showings: Simple and Safe Systems
Now that your home looks great online, buyers will want to see it in person. Here's how to manage that process professionally and safely.
Setting Up Your Showing System
Use Calendly (free version) to automate showing appointments. Set up available time slots. I recommend offering:
Weekday evenings: 5-7pm (after work)
Weekend days: 10am-4pm (flexibility for buyers)
60-minute appointment slots (gives you time to prepare between showings)
30-45 minute buffer between appointments (so you're not rushing)
Connect Calendly to your Google or Outlook calendar. You'll receive automatic email notifications when someone books a showing.
In your MLS listing, include: "Schedule showings at [your Calendly link]" or provide your Google Voice number with instructions to call or text to schedule.
Communication with Buyers
Get a Google Voice number (free). This becomes your showing contact number. Buyers call or text this number instead of your personal phone.
When buyers contact you, respond promptly with your Calendly link or offer 2-3 specific available times. Quick responses show you're serious and professional.
If a buyer has a real estate agent, the agent will coordinate showings. This is actually easier for you. The agent brings their client, you just unlock and leave.
If a buyer doesn't have an agent (this happens more in private sales), collect basic information before confirming the showing:
Full name
Phone number
Email address
How they heard about your property
Whether they're pre-qualified for financing (shows they're serious)
This isn't being difficult. It's being safe. You're letting strangers into your home. Basic information is reasonable. Beware of anyone who refuses to share even basic information.
Before Each Showing: The 15-Minute Prep
15 minutes before the scheduled showing:
Quick walkthrough to make sure everything looks good. Pick up any items that appeared since your last showing. Turn on all lights throughout the house. Adjust temperature to comfortable (68-70°F in winter, 72-74°F in summer). Put out fresh towels in bathrooms if needed. Make sure all rooms are accessible (doors unlocked, paths clear).
Put away valuables, medications, and personal documents. Don't leave mail visible. Lock up jewelry, electronics, prescription medications. Secure important documents.
Leave an information sheet on the kitchen counter. Include: Year built, roof age, HVAC age and type, utility costs (approximate monthly), recent major updates (new roof 2023, kitchen renovated 2022), lot size and acreage, well and septic information if applicable, neighborhood amenities.
During Showings: Leave Your Home
This is important. Leave during showings. Buyers feel uncomfortable looking at homes with the owner present. They can't speak freely with their agent or spouse. They feel rushed.
Leave 15 minutes before the appointment. Return 15-20 minutes after the scheduled end time. Go get coffee. Run errands. Sit in your car at a nearby park if you need to stay close.
If the buyer has an agent, the agent will bring them through. The agent is responsible for locking up when they leave.
If the buyer doesn't have an agent (rare but possible), you have two options:
Option 1: Give them self-showing instructions with a lockbox code or hide-a-key location. Tell them to call/text when they arrive and when they leave. This works for pre-qualified buyers who provided full information.
Option 2: Meet them there, let them in, give a brief tour, then leave them alone for 15-20 minutes to walk through themselves. Return at the scheduled end time to lock up and answer any questions.
Trust your instincts on safety. If something feels off about a buyer, don't grant showing access without being present. It's okay to require proof of financing or reschedule for a time when you can have someone with you.
After Each Showing: Collect Feedback
Send a follow-up email or text within a few hours:
"Thank you for viewing my home at [address] today. I'd appreciate any feedback you're willing to share. What did you like about the property? Do you have any concerns or questions?"
This feedback is gold. If three buyers mention the same issue (price too high, bathroom needs updating, yard needs work), you know what needs addressing.
If buyers love the home but mention specific questions about mechanicals, utilities, or neighborhood, answer those questions promptly. Responsiveness can turn interest into offers.
Keep track of showings in a simple spreadsheet (or pen and paper if you prefer). Date, buyer name (or agent name), feedback received, level of interest (high, medium, low). This helps you see patterns and adjust if needed.
Safety Guidelines and Best Practices
Trust your instinct. If someone requesting a showing makes you uncomfortable, require them to work with a real estate agent or reschedule for a time when you can have someone with you.
Secure valuables always. Even with agent-accompanied showings, lock away jewelry, cash, medications, and important documents. Most buyers and agents are honest, but why take the risk?
Consider security cameras. If you have a Ring doorbell or security cameras, keep them active during showings. Let potential buyers know cameras are present (this is legally required in Montana for interior cameras anyway). This protects both you and buyers.
Tell someone your showing schedule. Let a friend, family member, or neighbor know when showings are scheduled. Have them check in with you after showings if you're concerned about safety.
Check your home after each showing. Quick walkthrough to make sure everything is in order. Lock all doors and windows. Turn off lights if you won't be home for extended periods.
When Agents Call You
Let me address something you'll definitely experience: real estate agents calling to try to list your property.
When agents see your FSBO listing, many will call offering to help you sell. Here's how to handle these calls professionally:
If you're happy selling privately:
"Thank you for the call. I'm selling privately and have everything under control. If that changes, I'll reach out."
That's it. Polite but firm. Don't feel obligated to justify your decision or listen to sales pitches. You're in control.
If an agent is genuinely helpful:
Some agents offer to bring buyers without requiring you to list with them. They ask if you're offering buyer agent commission. This is legitimate. Answer honestly: "I'm offering X% buyer's agent commission" or "I'm not offering commission, but I'm open to negotiating that with serious buyers."
If an agent becomes pushy:
"I appreciate your interest, but I'm not interested in listing with an agent at this time. Please remove me from your contact list." Then end the call.
You don't owe anyone your business. You've made a decision to sell privately. Stick with it unless you genuinely change your mind.
Troubleshooting: When You're Not Getting Showings
If you've been listed for 2-3 weeks with no showing requests, something needs adjusting.
Problem 1: Price is too high
If you're getting lots of views online but no showing requests, buyers are seeing your listing and deciding it's overpriced. Reduce your price by 5% and watch what happens.
Problem 2: Photos aren't compelling
If you're getting very few online views, your photos probably aren't grabbing attention. Retake your photos following the instructions in this post. Good photos dramatically increase showing requests.
Problem 3: Listing description is weak
Go back to Post 3 and rewrite your description using the AI prompt. Make it more engaging and specific to your home's best features.
Problem 4: Showing process is too complicated
If people are asking about showings but not actually scheduling, simplify your process. Make sure your Calendly link works and has plenty of available times. Respond to inquiries within 2 hours.
What's Next: Turning Showings Into Offers
You now know how to photograph your Montana home professionally using just your smartphone. You know how to manage showings safely and efficiently using free tools.
The next post covers the final step: what to do when offers come in. I'll walk you through evaluating offers, negotiating effectively, and getting from contract to closing successfully.
Photography gets buyers in the door. Negotiation gets the deal done. Let's finish this.
Frequently Asked Questions
Do I really need professional photography?
For most Montana homes under $1 million, no. Your smartphone (iPhone 12+, Android from 2021+) takes excellent photos if you follow the preparation and technique guidance in this post. Professional photography costs $300-$500 and provides marginal benefit for standard homes. For luxury properties over $1.5 million or homes with unique architecture, consider hiring a professional.
How many photos should I upload to my MLS listing?
Minimum 15 photos. Ideal is 20-25 photos. Show every room, multiple angles, exterior from different viewpoints, outdoor spaces, and special features. More photos (up to 50) is fine for properties with significant acreage or many rooms. Buyers want to see everything online before scheduling a showing.
What if my home isn't in perfect condition?
Take honest photos that accurately represent your home. Don't hide issues, but don't highlight them either. Focus on your home's best features. Price accordingly for condition. Buyers will see the condition during showings anyway. Dishonest photos waste everyone's time and damage trust.
Should I be present during showings?
No. Buyers feel uncomfortable and rushed when owners are present. They can't speak freely. Leave 15 minutes before showings and return after they're scheduled to end. If you're genuinely concerned about safety with unrepresented buyers, you can be present but stay in one room (like the garage or yard) while they tour.
How do I handle requests for showings outside my available times?
Be flexible when possible, but don't feel obligated to accommodate every request. If someone genuinely can't make your available times, offer 2-3 alternative specific times. If they're still difficult, they're probably not serious buyers. Serious buyers make time to see homes they're interested in.
What if someone doesn't show up for a scheduled appointment?
It happens occasionally. Wait 15 minutes past the scheduled time, then move on with your day. Send a polite follow-up: "I had your showing scheduled for today at [time]. I'm sorry we missed you. Let me know if you'd like to reschedule." Don't take it personally. Sometimes buyers' plans change.
Ready for the final step? In the next post, I'll walk you through handling offers, negotiating effectively, and getting to closing day successfully. You'll learn how to evaluate offers, negotiate from strength, and avoid common pitfalls that cost sellers money.
This is post 4 of 5 in the Montana Private Home Selling Series.
Get in touch


© 2025 KT Ventures LLC DBA "We Buy Big Sky Homes". All rights reserved.
Real Estate Investor | Cash Buyers | Serving Big Sky Country | Montana, USA
Areas We Buy Montana Houses
Anaconda ● Belgrade ● Billings ● Bozeman ● Butte ● Columbia Falls ● Great Falls ● Hamilton ● Havre ● Helena ● Kalispell ● Laurel ● Lewistown ● Livingston ● Miles City ● Missoula ● Polson ● Sidney ● Whitefish